Best Thread For Sewing Machine For Machine Embroidery Design

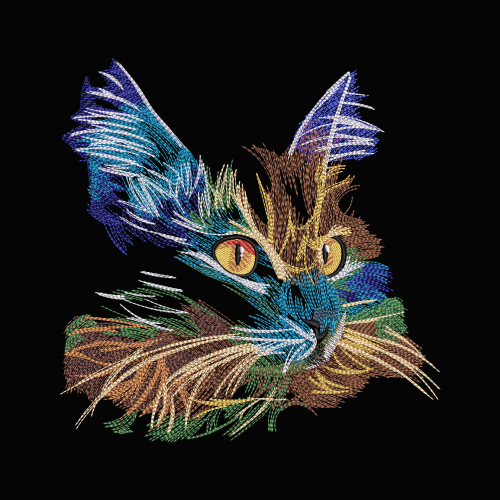
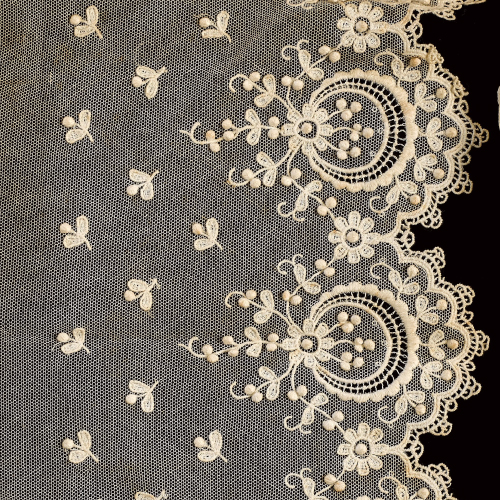
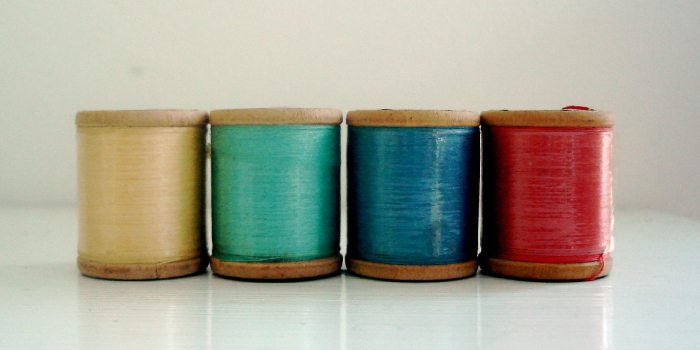
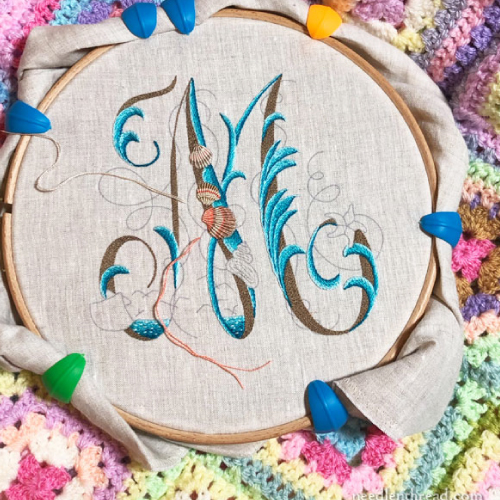
Thread weight is not just a number. It’s the thickness of thread that will be used for sewing. From finest to heaviest, the weights range from 8 to 40 weight. Many factors affect the selection of the best machine embroidery threads. These include the type of fabric, needle size, type of stitch, and other factors like age and condition of the machine. A machine embroidery kit often includes several thread brands and weights, so that you can find the best embroidery thread for your machine. However, knowing the basics of thread weights is important to choose the correct one! That’s where we come to your rescue! Read on to know what thread weights should you use for machine embroidery. 

You Need To Know That…

Embroidery machines usually come with a range of recommended thread weights for the different features. The best way to determine which thread weight you need is to test them out. Choosing the wrong thread weight can result in poorly sewn seams or a machine that won’t sew at all. The most popular types of threads are mercerized cotton, polyester, and nylon threads. Mercerized cotton threads are strong which makes them perfect for jeans stitching where they should withstand poking by a pointy object like a pin or needle. Polyester threads are strong, but not as strong as mercerized cotton. Machine embroidery thread is a set of threads, often two strands twisted together. Threads for machine embroidery can vary in weight, and there are many different types of thread to choose from regular sewing thread, extra-heavy-duty sewing thread, and heavy-duty sewing thread. 

Thread Weight Is A Measurement Of The Thickness Of A Thread. 

The weight should correspond to the material being sewn. The heavier the material, the thicker a thread needs to be. It is important to choose the correct thread weight for the type of embroidery machine sewing that you will be performing. If you sew lightweight fabrics then use a lighter thread weight, if you sew heavy materials then use a heavy thread weight. 

How To Read A Thread Weight?

When 40 kilometers of a thread weigh 1 kilogram, it is designated as 40 wt. Because it takes just 30 kilometers of thread to weigh one kilogram, a 30 wt. thread is heavier. Typically, when you look at a thread weight number, it would appear like 50/2 or 40/3. The misconception that the thread weight is a fraction is quite popular! However, the thread weight is only the first number; the second number is perhaps the thread ply. So, if you see 50/2 printed on a cotton thread, it indicates that the thread weight is 50 and the thread ply is 2. To put it another way, it’s a thin and robust cotton thread. It’s worth noting that if the ply is 2 or greater, the thread will be fairly robust and will stand up well to normal usage. 

Types Of Thread Weights

Regular sewing thread is typically used when using a regular needle or when using decorative stitches such as backstitching or cross-stitching. It is not recommended for use with heavier fabrics such as denim jeans or upholstery fabric. Heavy-duty sewing threads should be used in these cases instead. Some machines can use up to four spools of threads at once, each with a different weight (usually two). This means that in total there are eight possible combinations of thread weights to choose from! 

40wt Or 60wt, What Should I Choose?

Embroidery threads are often available in a variety of thread weights, the most popular being 40wt, followed by the finer and lighter 60wt. 40 wt. threads should be your go-to thread for general needlework. When creating patterns with fine details, use a 60wt thread. When a design demands tiny text or delicate detail, choose traditional Rayon No. 60 or Polyneon No. 60 threads. When stitching with a 60 weight thread, always use a 65 needle and increase density. 

40wt Thread:

If you’re looking for a glossy embroidery thread, a 40 wt. the thread would most likely suffice. In reality, there are likely to be few machine embroidery tasks for which a 40 wt. thread isn’t the finest option.

The most common alternatives for 40 wt. threads are rayon and polyester. Previously, rayon was thought to be the better option since it offered more shine and color options. On the other hand, it isn’t as sturdy, would quickly break during stitching, and wouldn’t hold up to regular laundering.

However, the polyester thread has continued to improve in terms of shine and color options and now provides almost as much diversity as the rayon thread. For experienced sewers who work on embroidered projects, this has made it the go-to thread for machine embroidery tasks. 

50 Wt. Threads:

The most common thread used by most sewers is a 50 wt. all-purpose thread. Polyester or a cotton-polyester combination is most commonly used. They’re appropriate for a wide range of sewing projects and are quite durable.

But there’s more to it than that. There’s a 50 wt. all-purpose thread and a high-quality 50 wt. cotton quilting thread to choose from. Although neither would fail you when it came to stitching into clothing or quilts, the latter would be more superior, especially for quilting tasks.

This is because high-quality 50 wt. cotton threads are both resilient and thin, allowing you to piece a quilt without bulking the seams, resulting in considerably superior outcomes while working on quilting projects. These threads, on the other hand, are fantastic for appliqué, hand applique, hand piecing, and machine quilting. 

Anomalous Thread Weights Info For You! 

12 – 18 wt. Threads:

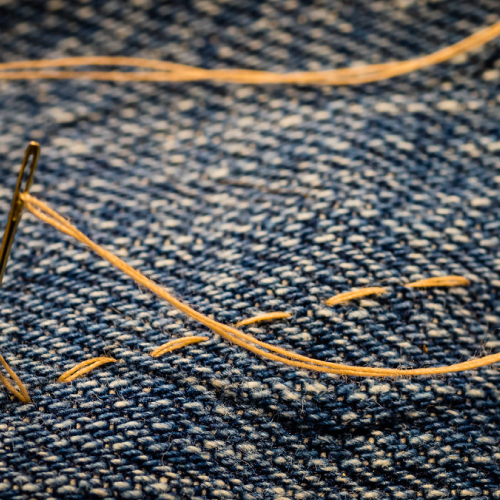
The 12 – 18 wt. threads aren’t widely used, but they have a special function. They’re a must-have for sewers who do a lot of hand stitching or topstitching.

When working on sewing tasks that need hand quilting or even hand embroidery, the 12 wt. thread is the finest choice. It wouldn’t let you down when it came to topstitching denim.

However, like with other thread weights, quality is more crucial here, and this is something you should bear in mind while buying for 12 – 18 wt. threads. When using a low-quality thread for hand stitching or topstitching, the thread may break often, causing the garment to fray.

28 wt. Threads:

This thread is used for hand stitching and hand quilting projects as an alternative to the 12–18 wt. threads. It can be more suitable for sewers who prefer not to use a heavy thread for hand stitching tasks. 

60 wt. Bobbin Thread:

This is an extremely thin, very strong thread that is used in the bobbin for embroidery tasks that do not require the back of the project to be seen. 

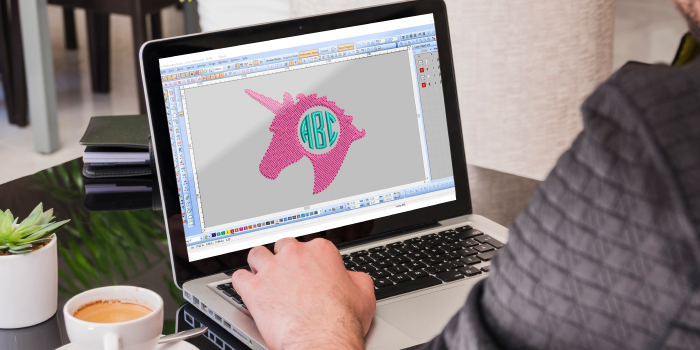
Role Of Thread Weights In Digitizing

The majority of digitized patterns are made with 40 weight thread. This guarantees adequate embroidery coverage. When using a 30 weight thread, the larger width of the thread might give a lumpy look or cause the thread to bind on itself, breaking the thread or jamming the machine. Reduce the density by one-third or expand the design size by 125 percent of the original to remedy this. Increasing the stitch length will also be beneficial.

Tip: Always specify which portions of the pattern will be embroidered in 60 weights when having a design digitized so that the Embroidery Digitizing Companies may avoid having to apply the fill. 

Here’s Your Takeaway!

Choosing the right thread for embroidery is important as it will affect the quality of the finished product. The weight of a thread will determine how easily it can be threaded through a needle and how quickly it will break if too much tension is applied.

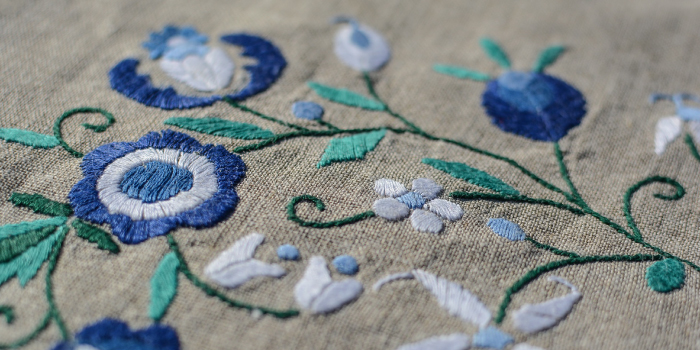
The type of fabric and project you are embroidering will determine what thread weight would be best. The most commonly used thread weights for machine embroidery are 40-weight cotton, 60-weight cotton, and 100-weight cotton.

Source: https://www.cre8iveskill.com/blog/what-thread-weights-should-i-use-for-machine-embroidery

Create Applique Machine Embroidery Using Computerized Embroidery | Cre8iveSkill

Applique is a long-aged sewing craft that uses thread and needle, in which fabrics are cut into different shapes and designs of varying sizes are sewn on a larger base fabric to form different designs. This craft is done by hand embroidery or by machine embroidery.

Creating Applique Designs

An applique is a form of embroidery, and it features a wide range of designs and can be achieved through different techniques depending on your choice. Applique embroidery designs can be done by hand and some on a sewing machine they are:

• Smooth edge applique
• Raw edge applique
• Reverse applique
• Decorative applique

Smooth Edge Applique

With the use of a sewing machine, the raw edges of the background fabric to be applied can be stitched around the shape in an attempt of getting it tidied with a chosen stitch to give a tidy finish that is smooth and neat to the user. A zig-zag stitch can give this result.

Raw Edge Applique

This design works well for ventures which will not be used frequently, as the raw edges would not be sewn over to create a seamless edge but attached to the fabric on the background. The fraying edges are left as it is. This design is ideal for smaller projects like greeting cards or wall-mounted pieces. Stronger and more durable stitches are used for items such as cushions or clothing. This design varies and can be molded according to what it is to be used for.

Multi-needle Hoop Applique

This technique is more specialized and rarely used. It is a stitching technique using a machine that requires the use of a multi-needle sewing machine as well as an embroidery hoop. Different colors, threads can be set up on the machine to be used. To create beautiful designs, each section of your design will be stitched accurately. It is best for quilting projects. This applique design is more suitable for those who have verse knowledge of embroidery.

There are different sewing machines used to achieve different types of applique embroidery designs.

Reverse Applique

As its name implies, instead of sewing fabric shapes on the background fabric, using this method you layer fabrics together on top of which you need to stitch a pattern. Then to reveal the shape and color Floral reverse applique, cut away parts of the fabric.

Decorative Applique

This technique is open to different variations and arrangements. It can be achieved using a machine. If you are making use of a sewing machine, you have the opportunity of making do with different stitching styles available to make your piece appealing to the eyes. Decorative applique can be as colorful or design as desired.

The Lowdown

There are different applique choices and variations at your disposal, this technique is one of the best that has been tried and tested. For those who love playing with colors and various types of fabrics, it is the best choice of technique. You discover the applique embroidery designs that best suit your embroidery project.

Applique designs can be applied in three main methods which include; Machine applique, Hand applique, and fused applique.

With the advancement in technology, Machine Embroidery Applique has come into play due to an increase in demand as the market has fully blown into the Fashion industry.

Machine embroidery applique is fast and easy but will always ensure that the applique embroidery designs are precise and perfect. Using fabric as the background of applique designs instead of a stitched fill reduces the number of stitches of a design drastically so you can use fewer stitches to stitch a larger design.

Choosing The Right Stich For Applique Machine Embroidery

This is the most important part of applique as this is what determines if your design will last longer. Gluing or fusing your applique pieces to a background fabric is nice, but gluing alone will eventually wear out and your wonderful design will fall apart.

Some of the most common stitches used with fusible applique are zig-zag stitch, blanket stitch, and straight stitch, notwithstanding, using different stitches can give a simple quilt look beautiful.

Zig Zag Stitch:

This is a common stitch but some machines come with multiple options for a zig-zag stitch. You can get a different look with a zig-zag stitch depending on the machine settings. One can be a satin zig zag and another can be a narrow zig zag.

Narrow (Fine) Zig Zag:

This stitch is bold but cannot be compared to that of the satin stitch. The narrow zig-zag can be considered as an invisible stitch. It does the job of securing the edges of the applique designs but won’t show as a solid line of thread. The stitch has a longer stitch length and a narrower stitch width.

Satin Zig Zag:

Its name originated from the fact that the stitches look like a piece of satin. It is a compilation of very thick and dense zig-zag stitches that are closely done making it hard to see any background fabric between the stitches.

Mostly the design gives you an idea of how to go about with the stitches.

Blanket Stitch:

This is a well-known method of stitching applique and it is made up of straight stitches along the outside edge of the applique which is accompanied by a perpendicular stitch into the applique design shape. This type of stitch shows the traditional hand applique stitching style.

 Most machines have multiple options for blanket stitches or might have none.

Straight Stitch:

This is an easy stitch type that may not be listed as part of stitches, but as the name implies it’s just a straight stitch.

Other stitches:

It is recommended that you create room on your stitch sampler and okay with different stitches and their settings. Blind hem stitch should also be tried in case you want to ever try out invisible machine applique embroidery and maybe decorative stitches.

Choosing the Perfect Thread Color for Applique Machine Embroidery


The color of the embroidery thread is one important aspect to put into consideration when doing an applique machine embroidery. You can try the following tips :

• The vertical stitch should be outside the edge of the shape when using a blanket stitch. The color of the thread should match that of the predominant color in the applique fabric and that of the background fabric if you find out that your applique stitches are drifting onto the applique shape as you work. By doing this, any mistakes will become less noticeable.

• Make use of a bold decorative stitch, when you don’t want to be bothered about lining the edges with needles. An example of decorative stitches is the star stitch and the rick-rack stitch.

• If the stitching is to be used as the overall design look of the quilt, use a thread that contrasts with the applique design and background fabric.

 In machine embroidery, when applying stitches to the digitization of the embroidery software, digitization converts the existing artwork into an applique embroidery designs file that can be run on the embroidery machine. In other words, embroidery digitization uses embroidery software to create a machine embroidery design file with a series of commands that tell the embroidery machine how to sew the applique designs.

When it comes to embroidery, the artwork alone is not enough. In order to embroider the design with a computer, only the design file can not meet the required purpose well. Although the artwork is also vital, in the process, another skill usually obscures the former’s skill. Yes, we are talking about embroidery digitizing. Like any other professional skill, the digitized file is prepared by a professional embroidery digitizer.

Nowadays, embroidery machines are very efficient and intelligent. The process is fast and quite automated. Nevertheless, this applique machine embroidery is not self-sufficient in interpreting the design. The machine cannot understand and embroider designs in simple digital format by itself.

Most clothing printing technologies can use and print from design files. Embroidery is an exception because applique embroidery designs are made up of stitches. Digitization is the answer to bridge this gap. The digital format of the design is its stitch representation. It divides parameters such as stitch position, stitch type, stitch path, and density across different areas of the design.

The responsibility for defining these parameters lies with the embroidery digitizer. The digital format of the design is created on a computer program, usually called embroidery digitizing software.

With the resurfacing of the term “automatic digitization”, which was introduced by a few embroideries digitizing software manufacturers. Regardless of its effectiveness, the term undoubtedly offers exciting prospects. The basic idea is to configure the software in a way that can be digitally designed without external input.

The design only needs to be entered, and the software will create a digital format of the design. Although this is interesting equipment worth thinking about, automatic digitization still has a long way to go. The software can recognize the design but still cannot define stitch parameters through different areas of the design. This still requires human intuition. Therefore, the role of embroidery digitizing services is still very important.

Source: https://www.cre8iveskill.com/blog/how-to-create-applique-embroidery-designs-using-computerized-embroidery

Know About The Types Of Machine Embroidery Thread


Machine embroidery – the art of the modern age – quick and accurate! We say it’s quick because multiple needles work their charm, and since machines are less prone to mistakes, they are accurate! The aesthetic of embroidery design is primarily affected by the quality of the stitches and the kind of embroidery thread used to produce it. To make your own embroidered masterpiece, you must select the best machine embroidery thread available, whether as a pastime or for business purposes. However, with so many embroidery thread types available in the market, choosing the suitable one for your projects can be tricky. But hey, with us, it’s a cakewalk! How? Read on to know! 

Are you choosing the cheapest threads? Is it a necessity? 

When you start a machine embroidery business, every buyer notices that the thread is not too expensive and fits the standards for an inexpensive business while keeping the customer’s wants in mind. Because most customers want cheap things, Rayon and Polyester are constantly at the top of the customer’s list of choices and expectations. Embroidery silk thread is costly and is used to make luxury clothing. Choose the threads according to your designs and the fabric. A thicker thread like wool will need thicker needles. Using it on a delicate fabric can (and will) mess up the embroidery design. 

Best Machine Embroidery Threads:


If you are a beginner in the embroidery business, then the most common question that might be popping up in your mind is how to pick the right thread for embroidery. The first thing to consider is the type of machine and fabric stabilizer that you will be using. If you use a hoop, choose an embroidery thread designed for hand stitching or decorative machine embroidery.

The size and type of embroidery will play a crucial role in deciding which thread to use. If you use a sewing machine for embroidery, it’s better to choose cotton thread because it will not break easily. Wool threads can also be used for this purpose because they are stronger and more durable than cotton threads. There are different threads for machine embroidery to use.

Embroidery Rayon Thread:


Most embroiders rely on embroidery rayon thread because of its high and shiny shine and beautiful hues. These are the most often used embroidery threads for both hand and machine and are made entirely of viscose rayon. Rayon is the most popular variety because of its colors, durability, low cost, and adaptability. Rayon is available in various sizes on the market and is also the best for machine embroidery push and pull. Rayon is offered in two weights: regular (40wt) and thicker (30wt).  

Embroidery Polyester Thread:


After rayon, most customers choose embroidery polyester thread since it is a very bright and synthetic thread on the market. Because these threads are bleach-resistant and difficult to fade, they are more beneficial for machine embroidery. They are strong because they are constructed of many strands.

The form is retained triangular to make them appear more gleaming and brilliant than rayon threads. Polyester threads are commonly used for children’s apparel and products since they are long-lasting and composed entirely of polyester. These threads are simple to use, especially for new embroidered.  

Embroidery Silk Thread:


Silk thread is the most lustrous for machine embroidery. These threads are typically utilized in elegant and opulent gowns and are regarded as expensive on the market. Filament embroidery silk threads are made up of several twisted strands. It is just an excellent dye absorber and is known as an aristocrat in threads.

These threads are exceptionally stable since they do not break while embroidering on clothes. It’s a thread that’s elastic, sturdy, robust, and delicate. These threads are ideal for tailoring, decorating, and finishing the edges of buttonholes. Silk threads come in various weights, but the 30wt and 50wt are thought to be the finest for machine embroidery. 

Embroidery Cotton Thread:


If you are using a hoop-less machine, choose an embroidery cotton thread designed for sewings like polyester thread or pearl cotton.

Cotton is a plant fiber. This implies that picking a 100 percent cotton yarn is a biodegradable and sustainable solution. This natural material is extremely light and fresh. Cotton is a long-lasting substance. Your needlework creations will endure a long time if you utilize them correctly.

Embroidery Cotton threads are the most natural and delicate threads to use for cross-stitch, redwork, quilting, and bean stitch patterns. Because of their delicate and slightly brittle feel, these threads are not as popular as polyester and rayon threads. Instead, these are excellent threads for machine embroidery. These are regarded as high-quality and fine threads because they always provide a pleasant and tidy appearance when stitched. They are typically seen dressed in traditional attire, mainly Egyptian clothing. These threads are gentle on the fragile fibers and give them a more refined appearance. Cotton threads in the 40wt to 50wt range are commonly used for machine embroidery. 

Wool Thread For Embroidery: 

Wool thread for embroidery isn’t generally used for machine embroidery, even though it is used considerably in many nations for traditional garments. It is a bit thicker than other thread embroidery and is a product of the materials received from sheep and rams. The wool thread is used in scenery, canvas, and decorating. It is being used for embroidery on home décor such as pillows, curtains, wall art, etc. 

Metallic Thread For Embroidery :


Metallic thread gives your machine embroidery creations a distinct appearance and feel. You’ll obtain a clever, professional look if you use the appropriate needle. Use a needle with a large eye hole to make threading more manageable. The metallic thread is prone to breaking, so a needle with a large eye hole will prevent the thread from shredding or breaking. Working with it might be frustrating, especially if you are a newbie. Again, this sort of thread should be used with high-quality digital patterns. 

Your Takeaway:


For the embroidery machine to work correctly, it is essential to use the right thread. It is not only about the type of thread but also how you choose it.

If you use an embroidery machine for sewing, the best embroidery thread to use is polyester or cotton thread. If you are looking for a different appearance or texture, try using wool or silk threads for embroidery.

To pick the right embroidery thread, consider what kind of machine you have and what type of stitch you will be doing. You should then consider your desired outcome and how much time your project will take. Finally, consider your budget and choose accordingly!

Source: https://www.cre8iveskill.com/blog/how-to-pick-right-embroidery-thread-for-machine-embroidery

A Complete Guide To Cap Embroidery | Cre8iveSkill

The hat industry is vast, with more than 2 billion dollars in revenue each year. Men and women love to have hats of different designs to make their look stylish. Also, the latest trendy designs of embroidery on caps make them more appealing. So we are here to teach you various ways to create custom embroidered caps.

Every cap is featured with soft-to-touch embroidery, with every single design possessing the quality of being unique and vibrant. In addition to this, customization of caps and hats is a raze using various types of embroidery.

The art of embroidering a hat can be tricky, but you can fix it all just by applying a few tips and tricks. To deliver the best quality of hat embroidery, we follow the entirely satisfactory process to make them unique and eye-catching in all ways.

Let’s dive into the article to know the most straightforward tips and tricks of custom embroidered caps. 

1. Get To Know The Physical Components

Before learning how to do hat embroidery, knowing the machine’s components is essential. After knowing the usage, it will become easier to use it properly. The components are needle, frame, clips, and embroidery hoops. With the perfect coordination of these elements, you can do hat embroidery with perfection. 

2. Choose The Suitable Material For Custom Embroidery Hat

The first step to specializing in hat embroidery is to choose a suitable material. There are dozens of caps available in the market. The three types of hats are one-piece hats, varsity hats, and famous sports caps.

You can select the fabric and color of your own choice. However, all of the hat varieties come under four main variants. Any of them can be the best pick for custom embroidery for hats. 

The four widely used fabrics are:

1. Polyester: Polyester is a synthetic material.
2. Nylon: Nylon is thin and lightweight.
3. Cotton: Cotton is a natural fiber.
4. Wool: knitted hats such as beanies are made of this fabric. 

3. Custom Embroidery Digitizing Suitable For The Fabric

The process of custom embroidery digitizing should be compatible with the various types of material. Some materials are stretchy, while some are tight weave fabric and are stable. So digitizing parameters change as per the characteristics of the fabric. Also, since the cap hoop rotates at a 180-degree angle, you should ensure that the design is the digitized center out and from bottom to top and of the cap. We need to hire an experienced embroidery digitizer to digitize a pro-styled embroidery on hats. Following the right tips and tricks would become more accessible to carve the best embroidery.

4. Best hopping Is A Must For Cap Embroidery

One of the best tips to carry out the perfect cap embroidery is holding the grip, and it can only be done through proper hoping. The material needs to be fastened tightly with the brim of the cap. Move the cap gradually with the rotator to follow the exact design. Also, stretch the fabric so that there is no fabric puckering. 

As much as you place the material accurately, it will lessen the chances of flaws in embroidery. Another tip is to clip the excess fabric at the back to avoid the trouble of handling the extra materials.

5. Select The Right Speed For Custom Embroidered Hats

To create custom embroidered hats, all one needs to know is the trick of hopping, balancing the right pace, and proper material usage. Use a stabilizer for keeping the cap flat to get embroidery done. The machine’s timing covering up several stitches during a specific time depends upon the design and fabric. 

For a detailed or tricky design, keep in mind to slow down the machine. Slowing down your machine helps to create a neat and clear design. However, structured caps run better at a fast pace as compared to unstructured ones. 

6. Make Use Of The Back Clip

For embroidery on beanies, you can get two kinds of stuff: fleece and the other is sweater-like knitted fabric. One of the best tips for accurately producing embroidered beanies is using pins and a hoop to hook the material in one place. 

If you want to have perfect custom embroidered beanies, you must use back clips. The back clips are undoubtedly crucial for an embroiderer to proceed with the ideal design. The back hooks keep the cap in the correct position and do not let the design look running. The use of these back clips works wonders for the site placements. 

7. Firstly Design The Outline For 3D Embroidery Hats

3D embroidery hats look stunning when they are processed under a perfect method. With the help of a few tips and tricks, you can stand out with 3D embroidery. To carry out the best embroidery, digitizing the outline at first can be a great tip. This outline stitch fixes the puffy foam to the fabric, which helps in keeping it stable throughout the entire embroidery process. Indeed, it ensures smooth stitching till the final look.

One of the concerned tips in 3D puff embroidery hats is that you shouldn’t exceed the limit of the stitch length suitable for 3D. For 3D puff, the minimum thickness is 0.2″ (5 mm), and the maximum is 0.5″ (12.5 mm). There should also be a space of at least 0.07″ (1.8 mm) between 3D objects. Your machine should leave a gap between two elements of the embroidery design. Another tip is to use bolder fonts and elements to maintain a neat appearance.

8. Employ Custom Digitizing Services For Embroidery

To do hat embroidery and mastering all tips and tricks, employing custom digitizing services matters a lot. With the use of this, you can take digital prints of several designs and create your design as well. If you own a custom apparel business or plan to do it, you can get your designs done in bulk from experts like cre8iveskill.com. The best digitizing platform, famous for offering lots of artistic services like digital embroidery, color blending, and many more. 

Conclusion:

Every hat can have a suitable embroidery, and it is not as tricky as it looks. Many artistic designs can be produced by keeping in mind the components and valuable tips and tricks. The steps mentioned above are written to give you an idea about how you can do hat embroidery. Please read them carefully and use these tips to get the most delicate piece of the embroidered hat. Studies have proven that wearing a hat impacts your gracefulness, visibility, and cuteness.

Source: https://www.cre8iveskill.com/blog/how-to-do-hat-embroidery-latest-tips-and-tricks

Get Christmas Embroidery Ideas & Embroidery Digitizing Service

Festive Embroidery Digitizing And Digitized Designs

Do you like to send unique gifts to your dear ones in the coming Christmas season? Undoubtedly personalized gifts can become more valuable to your friends and families. Indeed, greetings cards and gift cards are easy to personalize by writing recipients’ names. But, to customize fabric items, you can rely on embroidery technologies.

You may have chosen some simple handcrafted Christmas gifts for your near ones. But you can always add value by adding embroidery design to it. However, you do not need to put effort into embroidery digitizing those chosen embroidery designs. Some professionals help you with the Christmas embroidery digitizing service.

The embroidery digitizing process will ensure accuracy in the embroidered designs. Professionals will use a particular software application to digitize the design for the desired output. It is not an automated process, as there is a need for artistic skills to accomplish the task. Thus, you can hire certified professionals to get attractive Christmas machine embroidery designs.

Embroidery digitizing solutions are not only best for your gifting purposes but also for your Christmas home decoration ideas too. You will have unique home decors that reflect the beauty of embroidery designs.

But, what items can you personalize with Merry Christmas embroidery design? 

Different Fabric Towels

Different Fabric Towels

From tea towels to dish towels, everything can be embroidered. As you like to host a Christmas party in your house, you may need to provide your guests with towels. That is why Christmas-themed towels will add a twist to your party.

You may embroider your towels by displaying flowers, Christmas quotes, and anything else. It is one of the best ways of making your everyday essentials unique and more attractive. 

Beanies With Embroidery 

Beanies With Embroidery

Custom knit beanies with beautiful embroidery designs can be a perfect gift on a Christmas day. Beanies will make your dear ones feel cozy. You can choose a small pattern and any design for the embroidered beanies. Red beanies with embroidery themes can bring a big smile to children. 

Embroidered Tote Bags

Embroidered Tote Bags

Bags can be the most thoughtful giveaway on any occasion, and you can choose the fabric bags to apply the embroidery design very quickly.

Plain tote bags look dull, and that’s why you can start looking for Christmas embroidery patterns to customize your bags. DIY embroidered gifts will be highly adorable for everyone.

Some businesses also invest in embroidered tote bags to use as promotional gifts. You may also buy services for digitizing Christmas-related designs. Visit any online site like cre8iveskill.com for a Christmas design download and ask your professionals to add the design to your bag. You can also create embroidered logos to personalize the fabric tote bags. Put more gifts into your bags and please your employees with special Christmas giveaways. 

Blankets With Embroidery Designs 

Blankets With Embroidery Designs

As we enjoy Christmas on the chilly winter days, blankets can be the most thoughtful gifts. Minimalistic designs on your non-stretchy blankets will create an attractive look. However, some blankets have a fluff fabric, and stitches can sink into the soft material. Thus, you need to be careful when choosing the blanket fabric or embroidering. 

Embroidered Yoga Mat

 Embroidered Yoga Mat

Your friends and relatives may be fitness lovers and do yoga every day. Customize yoga mats using embroidery designs. Embroidered yoga mats will be the perfect holiday gift for your buddies and family members. Christmas custom embroidery digitizing companies will apply the best technique to beautify your yoga mats. 

Embroidered Wall Decors

Embroidered Wall Décors

Jute and other fabric wall hangings are some traditional decors for both homes and offices. Find the best Christmas wall decor ideas and apply the embroidery designs. For instance, you can show Jesus Christ portrait, Santa Clause caps, or any Christmas sayings on the wall hangings.

Are you now ready to offer some custom Christmas gifts with embroidery digitizing solutions? You can hire reliable professionals to implement the design properly. With the embroidery machine and digitizing software, they will provide you with the best solutions. Your handcrafted items will look distinctive due to the embroidered designs.

Source: https://www.cre8iveskill.com/blog/christmas-festive-embroidery-digitizing-and-digitized-designs

Custom Embroidered Patches For This Christmas Decoration Ideas | Cre8iveSkill

5 Christmas decor ideas with custom embroidered patches - Cre8iveSkill


Christmas is all about having a cheerful festivity for all. What about making this day amazing with some creativity? Decor your house with some vibrant creative skills that can speak the height of your joyous mood on Christmas. Let’s bring this all on point and cover it up in the most comprehensive way. Put your hands on Custom embroidered patches and decorate your place in a more aesthetic sense. Indeed, the custom-made stuff creates a unique aura of creativity.

Whether you want to decorate a Christmas tree or to have a personalized outfit, Christmas patches are here for you to rock. Get them now and set a Christmas party theme. Everyone attracts the custom patches as they perfectly describe your style.

There are lots of ideas for decorating your home and Christmas tree with embroidered patches. Let’s find out more in detail about them. 

1. Embellish the dress with Christmas sew on patches

Embellish thedress with Christmas sew on patches


Christmas is just around the corner, and along with home decorations, you must be thinking of the outfit you should wear. What should I wear to look different from the last time? How can I look outclassed from the rest of the crowd? These questions are such that you must have gone through while preparing yourself for any event.

Everyone wants to look fabulous among all, and everyone even can be for sure. Pick a dress of your choice and make it more classy with Christmas sew-on patches. It will make you look elegant and all set according to the Christmas vibe. 

2. Easy peasy decoration with Christmas iron-on patches

Easy peasy decoration with Christmas iron on patches


With the arrival of any festivity, the burden of house chores gets doubled. But what about if you can make a quick turnaround of designing your living room for Christmas within no time? Isn’t it appealing? Of course, it is. Grab your hands now on our artistic collection of Christmas iron-on patches that are specially designed to enrich your house with a classy style. In addition to this, you can also keep a small decorated Christmas tree by the side of sofas in the living room or the middle of the hallway. For making the tree more attractive, put some embroidery ornaments on it; it will look fabulous. 

3. Embroidered Christmas decoration

Embroidered Christmas Decoration


Christmas counts among the special occasions of the year. Will you pass it as just by ordinary set up and simple decor? It should be celebrated in a customized manner that can tell the uniqueness. For this, you can be skillful by doing an embroidered Christmas decoration. This would give the best matching outlook with the occasion. 

You can set up this embroidered decoration by using Christmas embroidery patches. For instance, style the light-colored curtains with vibrant patches or sew the patches on cushions and pillows. It will create a matching theme with the event. 

4. Christmas Tree decoration

Christmas Tree decoration


You can pick lots of elements for Christmas tree decoration like lights, ornaments, jewels, and garlands. Let’s be more spectacular in decorating a tree. Decorate the Christmas tree this year with personalized embroidered patches

You can get these customized patches in all unique and creative designs. Also, the embroidered patches look distinctive and impressive enough to catch everyone’s eye. 

5. Danglers For Christmas

Danglers For Christmas

Christmas decorations without danglers seem like something is missing out. Express your thoughts and ideas with customized danglers. Danglers For Christmas are available in soulful crafts; grab them and enrich the beautiful outlook of the whole decoration.

Conclusion:

Celebrate Christmas this year with such unique, impressive ideas. Indeed, the aesthetics of the artwork will make your day memorable for years. So, what are you waiting for? Hop on to Cre8iveSkill and go through the fantastic gallery; you’ll have a bunch of things to add to your bucket list of shopping for Christmas.

Source: https://www.cre8iveskill.com/blog/5-christmas-decor-ideas-with-custom-embroidered-patches

Embroidery Digitizing for Christmas Table For Christmas Decoration Table Idea

Embroidery Digitization For Setting Up Your Christmas Table

Setting up your Christmas table is exciting and invigorating with the festival of Christmas just about to approach this December. Everyone is completely soaked in the festive mood while preparing for the grand celebration beautified with ‘Reds, Greens, Golds and Whites’ all around.

Colors of Christmas

These are the ‘Colors of Christmas’ that marks a symbol of this glorious festival and has their own significance in the traditional religious records. Red symbolizes the birth of the son of God, Green symbolizes the color of life, Gold is tagged to be the color of sun and light, and white symbolizes peace and purity. Embracing the significance of these colors, every Christmas is beautified by various adornments and decorations all around in majorly these four mentioned colors. Now, when it comes to decorating the table for Christmas dinner, Christmas party, or any sort of get-together then it becomes even more significant to adorn the table flawlessly. An embroidered table cloth with Christmas redwork embroidery patterns wrapping the tabletop is then a sure shot showstopper.

digitized embroidery designs for Christmas

Then there are many other ways to add up to the aesthetics of the Christmas table using embroidery digitization. Some of the most mesmerizing add-ons can be:

  • Hung tree and wreaths in gold and green make a stunning difference
  • Beautiful 3D embroidery stitches in red, green, and gold for cutlery holders and table runner
  • Red, gold, and white Christmas Embroidery Designs For Towels and napkins
  • Metallic thread embroidery with a touch of sparkle on the table linen
  • You can even opt for Christmas word art files beautifully embroidered on table mats
  • An inspiring appliqué stitch on the linen and table runner for added elegance
  • Holy motifs and trapunto quilting on the table cloth or placemats with colorful embroidery threads enhances the feel of festivity
  • Embroidered patches of fairies, Santa Claus, Christmas tree, and flowers on various table adornments

Open the window to your imaginations and explore it to its maximum potential, there are many more options available as Christmas embroidery kits you can choose to have when planning to set up your personalized Christmas table. All you need to do is soak for a festive addition and you will certainly be able to create a perfect piece of holiday table for your glamorous celebration this Christmas. What finally gives a remarkable presence around the table is your presence wrapped in the most elegant and pretty embroidered apparel.

Source: https://www.cre8iveskill.com/blog/embroidery-digitization-for-setting-up-your-christmas-table

How To Create Unique Monogram Machine Embroidery Designs

CREATE UNIQUE MONOGRAM EMBROIDERY DESIGNS BY DIGITIZING - Cre8iveSkill

Introduction:

Even with technological advancement, monogram embroidery has defined our personality as its demand is not seasonal. Though getting an amazing design is not an easy task, monogram digitizing can help in this case.

As a beginner, creating embroidery monogram designs can be done quickly without stress with the help of embroidery software and an embroidery machine to sew your designs. Digitizing companies can be of great help when it comes to monogram digitizing. To get your desired monogram applique you will need to follow till the end of this article.

However, before you can monogram anything, you will need to know how to set up a monogram file and get it onto your embroidery machine.

How To Set And Load A Monogram File

How-To-Set-And-Load-A-Monogram-File

Fortunately, setting up a monogram can be achieved in stress-free ways and doesn’t cost a fortune. One of these ways is the use of embroidery software.

First of all, to figure out how you want to design the monogram and the order in which you want to stitch the letters, you need to set up the monogram embroidery file before you proceed to load it into your embroidery machine.

Use Embroidery Software To Create Embroidery Designs

Use-embroidery-software-to-create-embroidery-designs 

Step 1. First, import some form of artwork into the embroidery software. 

Then you have these options:

1. Use the automatic digitization function to convert the image into an embroidery
2. Manual digitization for total control to create more complex and complex embroidery designs
3. Combine the two methods

When you combine the first two methods, you will use an automatic digitization tool to create specific parts of the embroidery design and then manually digitize the area to add more details.

Step 2. Set the appropriate size

Measure the space you want the logo to appear on the product. Before locking the picture, please make sure that you have placed the correct and accurate size for the logo because the final product will have a precise design size.

Step 3. Select stitch type

This image has an empty alt attribute; its file name is stich%20type.jpg

Embroiders use different stitch types to create unique styles, textures, appearances, etc. The choice of fabric, the push-pull resistance of the material, and the maximum stitch length are all factors that must be considered. Common stitch types for machine embroidery include:

• Straight stitch
• Fill stitch
• Satin stitch

Step 4. Stitch direction

Stitch Dresction

Determining the stitch direction allows you to create a blueprint for the machine. This step is essential because the machine needs instructions for each stitch. The pattern of stitches can make the fabric have different tones and contours to replicate the logo design as best as possible.
You cannot skip this step because your final product may need to go through multiple jumps and very uneven machine stitch patterns. The correct stitching will also save you thread costs and time.

Step 5. Embroidery thread color 

Choosing the right color is as important as determining the fabric and stitch type. The color determines how accurately you can copy the digital version of the logo. Make sure to select the desired color from the color bar carefully. The color of your logo must go hand-in-hand with the color of the thread you choose for embroidery.

Step 6. Transfer and digitize embroidery files

Transfer-and-digitize-embroidery-files

After converting ordinary files such as JPEG, PNG, PDF, etc., into embroidery files, you must now transfer the embroidery file to the machine you will use for embroidery. The transfer process is very simple; you can use a flashcard, a computer containing embroidery software, or even a USB cable to complete this process.

The above step is essential for your embroidery machine to recognize the file before it starts working and make sure you choose the appropriate file format that matches the machine type.

Step 7. Prepare the machine

Prepare-the-machine

Before your embroidery machine sews digital logos on brand products according to your instructions, you must complete a few steps to prepare the embroidery machine for sewing. It would be best to inform the machine of the settings that must be used by selecting the thread, stitch order, needle, direction, necessary thread color, etc. This may depend on the stitch type and software you are using. The second thing you need to do is place your fabric or product in the embroidery machine frame/ring while carefully sliding them into the embroidery machine’s arms.

Step 8. Sample test

When using a digitized monogram design, it is always best to test the performance of the machine. This is an essential step that takes no time to carry out 

Rules To Follow To Get Desired Embroidery Monogram Pattern

Rules To Follow To Get Desired Embroidery Monogram Pattern

Essential features that define a monogram include being both attractive and having high durability. Here are the rules to follow to achieve your desired embroidery designs for monograms.

Underlay Correctly

You can use the default settings available for underlying but you have to ensure it is done properly. Underlying correctly is the basis of getting unique stitches done. It has to be detailed for monogram digitizing.

Monogram fonts embroidery and the material to be used determine the type of underlay to be applied. This also applies when using the small and large letters used in monogram digitizing; the small letters are done using the centerline overlay, while the large letters are done using the zigzag or

double zigzag stitches. This makes it easy for digitizing. In most cases, the zigzag works fine.

It is advisable to keep stitches dense as it gives a monogram a unique look. 

Large Monograms:

Large-Monograms

This is a popular kind of monogram. It is essential to be knowledgeable on how to go about making large monogram embroidery designs in case of problems if it arises. Blended satin stitch with the smallest issue gives you a similar look to the normal satin. Creating a split satin can be done generally in two ways; random split and percentage split. The random split gives you a natural look of satin to lettering while splitting by percentage further into a fixed percentage in digitizing. 

Base Fill Or Backdrop:

Base-Fill-Or-Backdrop

A digitizer is responsible for ensuring that the monogram remains intact throughout the lifespan of the embroidered item. To achieve this, the digitizer ensures that a backdrop or abase fill is available when digitizing for embroidery. This not only helps keep the monogram intact but also helps improve the aesthetics of a monogram.

Base fills or backdrop also help the decorative appearance of a monogram applique more pronounced in thick fabrics, restricts stitch twisting, and makes lettering clearer and intact. 

Conclusion:

So, having seen the steps on how to set up and load a file to create embroidery monogram designs and the rules to produce excellent and creative designs, it is now left for you to choose either to follow the rigorous steps or hand it over to digitizing companies. However, make use of the appropriate software and tips to create unique patterns and designs.

Source: https://www.cre8iveskill.com/blog/create-unique-monogram-embroidery-designs-by-digitizing

The Complete Guide To Techniques Involved | cre8iveskill

Digitized Embroidery Complete Guide to Techniques Involved


The textile industry is a vast industry that involves the production, marketing, and sales of textiles. Digitized embroidery has been around for decades, but it is becoming one of the most popular forms of textile decoration. This form of decoration offers many benefits over conventional embroidery techniques such as higher speeds, fewer labor costs, flawless and vast creativity, and improved quality.
You’d think that as the industry is so vast with so many choices, it’d be challenging to indulge in, right? But it’s entirely the opposite. It’s just a matter of finding the best in this industry, like Cre8iveSkill, to take care of your needs. You’d then be relaxing on your couch while having your imagination come to life with digitized embroidery.


Embroidery allows you to use your computer to create custom designs for apparel and fabric items of all kinds – even home decor! Once you’ve chosen a design, the machine stitches it onto whatever item you want using its needle and thread or yarns. While clothing manufacturers have used traditional hand-embroidery since ancient times, digitized embroidery brings more innovation, limitless creativity, and a wide variety of choices to the table.


Let’s get to know more about what embroidery digitizing is and what techniques and processes it involves.

What is Digital Embroidery?

What is Digital Embroidery - Cre8iveSkill


The term embroidery is often banded around and used interchangeably with ‘sewing,’ but they are not synonymous. A traditional hand embroidery is a form of needlework that uses strands of thread to stitch designs onto fabric or other materials by hand.
Digital embroidery, on the other hand, in simple words, involves turning an image or logo file into an embroidered pattern with the help of software so that the machines can follow the exact design during stitching. The types of embroidery digitizing are selected based on the requirements, design, and material.


However, embroidery digitizing isn’t as simple as uploading your image file to the embroidery machine and setting it to work. It’s much more sophisticated than that and requires skilled hands. Converting the images digitally into embroidered designs is not 100% automated because the machines cannot recognize and read the same files that your computer can.


So we have to convert them into a digitized design because that’s the language an embroidery machine can understand.


Hence, digital embroidery is a more challenging, complex, and unique technique, the output of which fares far better in quality than traditional hand embroidery. 

How Has Embroidery Digitizing Been A Game Changer?

How Has Embroidery Digitizing Been A Game Changer - Cre8iveSkill


The modern embroidery field has seen a lot of change in the past few years. It is now common for designers to digitize their designs before sending them to an embroidery machine. There are many advantages of doing this, the first one being that it saves time and money, which is great for both customers and designers. The most important benefit is that digitizing offers more design options, which leads to better end products!

With more choices, more innovation, and more affordability within less time, you can get it all with digital embroidery. 

How is Embroidery Digitizing Carried Out? 

How is Embroidery Digitizing Carried Out


Digitized embroidery uses computers and advanced technology to create stunning designs that are unique and easy to use. This new method has advantages over traditional hand-embroidered garments such as speed, more detail/variety in design options, and low cost compared with other forms of embellishment (e.g., beadwork).


While it’s not necessarily meant to replace traditional methods forever, digitized embroidery offers consumers an affordable way to add interest and depth to their attire for any occasion or season. Digitized embroidery is simply a modern way to bring together old and new embroidery techniques.
An embroidery machine can create designs with the help of embroidery digitizing, which could not be made otherwise because they are too intricate or detailed. It’s an exciting process that allows for more creative freedom, making it perfect for those who want to make their designs stand out from the crowd with a traditional but unique (and even better) look.


Digital embroidery has ushered us into a new era of creative freedom that was impossible with hand embroidery. It has enabled textile customers to choose an embroidery pattern and convert it into a digital file with minimal effort. This file can then be used in embroidering or printing on fabric with the help of any machine. Digitizing has made life easier for fashion wear consumers and textile customers because they no longer have to spend hours creating their own designs for printing or stitching on clothes and other accessories.


There are many different types of embroidery digitizing. It is up to the designer which type they choose for their design, depending on what effect they are looking to get from it. Here are some common types of embroidery digitizing that can be used in the textile industry and fashion wear designs.
The post goes into depth about the different types of embroidery digitizing and provides examples of each one. 

1. Flat Embroidery Digitizing:

Flat Embroidery Digitizing - Cre8iveSkill


One of the most common ways of digitized embroidery is flat embroidery digitizing. It involves the application of pattern stitching directly onto the fabric backing to create an elaborate flat design.
This process does not distort the images & designs, hence making it very popular for embellishment. Flat embroidery digitizing is mainly used when the patterns to be stitched are sophisticated and detailed. The created designs may not be as flashy and bold as the other techniques. Still, you won’t have to worry about the distortions in the design or logo when you create intricate designs with flat embroidery digitizing.

2. 3D PUFF Embroidery Digitizing:

3D PUFF Embroidery Digitizing - Cre8iveSkill


3D puff embroidery digitizing is created for 3D embroidery in which the surface of the design is raised by placing a foam underneath the embroidery stitching. It gives the digitized design a three-dimensional & aesthetic look by making the design stitches stand out on the fabric.
3D puff embroidery digitizing is perfect for simple designs and logos without any complexities, for instance, initials & alphabets. Likewise, it’s primarily used for bolder and bigger designs that are supposed to stand out and get noticed.

3. Applique Embroidery Digitizing:


In applique embroidery digitizing, designs are made by sewing or sticking woven pieces or fabric patches onto the larger pieces to form a specific pattern. More extensive patterns are created by attaching various smaller designs. If you want to personalize a design or give it a personal touch, this method would be best suited to make it unique and more beautiful.
Applique embroidery digitizing is mainly used for decorations on garments or as badges for organizations and institutions. Quilting and banner-making processes also make use of the applique, digitizing extensively.

4. Chenille Embroidery Digitizing:

Chenelli embroidery digitizing


Pretty sure that you must have seen a few digitized embroidery designs with soft and fuzzy fabric. That’s all thanks to the Chenille embroidery digitizing. Chenille is made from twisting together short yarns (silk + wool or cotton), giving it its characteristic softness and texture. Special care is taken regarding the yarn density while making designs with the help of Chenille digitizing.
This technique works best for more extensive and plainer designs that have a felt backing. The designs’ softness and textures in Chenille digitizing set them apart from the other types of embroidery digitizing.

5. Sequin Embroidery Digitizing:

Sequin Embroidery Digitizing - Cre8iveSkill


For Sequin embroidery, the machines have to be equipped with a sequin dispenser. The dispenser drops sequins onto the fabric as the machine continues to stitch. Sequin embroidery includes plastic disks, material, a textured surface, and a high shine in most cases.
This process is, in fact, truly worth the experience as it is easier to get excellent results and high-quality designs. Sequin embroidery digitizing will help your fabric design surpass other designs in uniqueness and excellence.
However, if any wrong design is chosen, the uneven, raised, and unstable sequin structure will adversely affect the covering stitches. So our team at Cre8iveSkill makes sure to consider only the correct selection of compatible designs for sequin embroidery digitizing.

6. Cording/Taping/Coiling Embroidery Digitizing:

Cording embroidery


Cording or taping embroidery digitizing involves the creation of original convex designs to create a 3D effect. This type of embroidery digitizing is mainly recommended for children’s products. It allows you to create unique designs using ribbons and beads and combine them with other decorating materials such as pearls and jets.
Taping means sewing on the cord along its middle to make it flatter and more expansive.
The design includes wrapping the colorful threads around a core thread attached to the base material in coiling digitizing. It hides the base stitches and avoids having any additional stitches or materials on the bottom side of the garments.

7. Chain Stitch Embroidery Digitizing:

Chain Stitch Embroidery Digitizing


Chain stitch digitizing is best suited for designs that include loops and stitches to form chain-like patterns. This technique is usually laborious and challenging as compared to other types of embroidery digitizing, and the designs may not come out to be very aesthetic. Additionally, it uses a lot of thread.
On the plus side, digitizing the chain stitch embroidery helps create thick textured lines and ensures that chain patterns are perfect in the source images/designs.

8. Photo Stitch Embroidery Digitizing:


The process of photo stitch embroidery digitizing makes the design on the material consequently look like an artist’s work on canvas. It includes multilayered and multi-colored stitching that provides the design with its volume and color tone modulation. Photo stitch embroidery digitizing has some characteristic features that include bigger design sizes and a considerably large number of stitches.
Hence, the digitization of photo stitch techniques executes the designs and coloring masterfully and harmoniously. In addition to that, you will be thoroughly satisfied with the work of art that photo stitch digitizing produces.

9. Borer Embroidery Digitizing:

Borer embroidery


The machines at Cre8iveSkill are equipped with boring tools (knife, needle) to cut holes in the fabric. Borer embroidery digitizing consists of designs having borer holes due to the needle penetrations, regardless of the stitch types. This type of embroidery is commonly stabilized with zigzag and satin stitching to prevent the fraying of threads.
Borer embroidery digitizing is one of the most complex and challenging types of embroidery digitizing to muster. Still, our team at Cre8iveSkill has ensured that this process is masterfully executed to perfection to give you the flawless results that you want.

10. Freestanding Lace Embroidery Digitizing:

Freestanding lace embroidery digitizing


How can making laces not be addictive? It definitely is.


This technique helps create beautiful, airy patterns that you can make into different items or accessories like ornaments, covers, etc. The machines stitch out the specially digitized designs in the form of laces onto a water-soluble stabilizer. Once the pattern has been created, you can rinse the stabilizer away to leave the mesmerizing lace design behind.


Cre8iveSkill excels in this type of embroidery digitizing. In fact, our skilled experts and the machines that we use ensure that the lace patterns are gap-free and freestanding, thereby preventing the prevalent issue of gaps between the inner netting designs and the satin stitch borders of the digitized embroidery pattern.


The embroidery digitizing industry has come a long way in the last few decades. The technology is constantly evolving so that it can provide more efficiency and reliability in the market. And all the techniques that we’ve just mentioned are a testament to that fact. 

Which One Should You Opt For?

Which One Should You Opt For - Cre8iveSkill


Have you ever had that moment where you’re out and about and stop to admire the embroidery on a dress or jacket? Maybe it’s an intricate design, like the one on a Ralph Lauren silk blouse. What is your favorite technique for digitizing embroidery from all of the ones I have mentioned above? Some people prefer using 3D puff embroidery digitizing for quick embroidering jobs to make them stand out from the rest. Others find it more cost-effective to use flat embroidery digitizing, as seen in a few vintage Chanel jackets.


Deciding which method is most effective isn’t just up to your mood or choices, unfortunately. It comes down to several factors like your budget, the materials to use, types of fabric and thread, color contrasts, longevity, and the exact requirements.


Each of the embroidery digitizing techniques is simply superb to get the work done. But the choice would still be dependent on your requirements and needs. For example, applique embroidery digitizing is best suited for use on official uniforms and garments of law enforcement institutions. 3D puff embroidery digitizing is best suited for hats and casual leather jackets. Thin fabrics and sturdy fabrics would involve different digital embroidery techniques. 

Talk To Experts To Help You Choose

Talk To Experts To Help You Choose - Cre8iveSkill


In such a scenario where you cannot decide or choose the best technique for your digital embroidery designs, always seek professional consultation of embroidery digitizing services to help you choose the one that is best suited to your needs. The experts will take your needs and requirements into account and then suggest the best possible way out so that you can have a top-notch experience with your designs, portraying your values and branding efficiently.


To take away your hassles of doing so, Cre8iveSkill steps in to take care of your needs. One of the most critical aspects of an embroidery design is its flawless quality and seamless appearance. For 25 years, we at Cre8iveSkill have been doing just that in our digitizer embroidery service!


We believe in reinventing artistic endeavors without compromising the quality of your designs. Our professional embroidery digitizers design everything according to your requirements. We are honored to have a dedicated team of skilled professionals, designers, and embroidery digitizers who are impeccable with their work to deliver our client’s design needs. Every single one is handled with care by an expert staff who knows how important this work really can be for you!


Top-class quality and maximum efficiency with the help of state-of-art equipment is our trademark, so you don’t have to worry about anything but getting your designs digitized just right. Hence, Cre8iveSkill is your go-to if you want to take designs to a whole new level of creativity and imagination affordably.


You don’t have to do much; we are just a few clicks away. So contact us right now and let us turn your vision into a unique design that speaks out your values and standards loudly and clearly.

Source: https://www.cre8iveskill.com/blog/digitized-embroidery-complete-guide-to-techniques-involved

Everything You Need To Know About The Embroidery Digitizing

Embroidery digitizing Everything you Need to Know

What is the most important aspect of machine embroidery? Artwork? Indeed, it is.

 The artwork is the most crucial aspect of machine embroidery as it is a brain-child of an artist who visualized it on a better and more creative platform, embroidery! An artist creates an artwork that visualizes it as embroidered on a jacket or a shirt or a cap. Digitization industry has a lot of highly trained and skilled embroidery digitizers who digitize the artwork to embroidery machine-friendly files using best in class digitizing software which is reliable, trustworthy and cost-effective. Looking for online embroidery digitizing services? Your search ends here -> Cre8iveSkill. An online embroidery digitizing firm which ensures high productivity, efficiency, reliance, trust. All at amazingly competitive prices.

Embroidery Design: Woman Face

What is Embroidery Digitizing?

What is Embroidery Digitizing? We have advanced into a world of technology where everything you see on a screen can be printed on any product of your liking. You can even optimize your designs in such a way that they can be printed as embroidery on anything. Machine Embroidery digitizing can make your tasks easier and help you save time and finish your projects efficiently.

IS OUTSOURCING DIGITIZED EMBROIDERY A GOOD IDEA?

Yes, it is! Embroidery digitizing is an expensive affair as the software used in digitizing the artwork is best in class software. Also, the digitizers are highly trained and skilled which involves lots of capital investment and also a lot of time. Embroidery firms are usually small scale industries which cannot bear such expenses, that’s when outsourcing helps. As the industry has developed, digitizing firms have started to work online and accept orders from around the globe. Firms like Cre8iveSkill accept your artwork in any format and with a turnaround time of just 12 hours, will convert your artwork into beautiful digitized embroidery which can be easily run on embroidery machines. This not only saves time but also saves investing in quality checks of the embroidery, as the highly skilled and trained embroidery digitizers do the complete quality check by sampling the digitized embroidery.

WHAT ARE THE ROLES OF DIGITIZER AND EMBROIDER?

Embroider and digitizer are two different people in the same industry, working on the same project but with different approaches and are interdependent on one another. Embroider works with the physical product that includes fabrics, needles, threads, and other stuff. He is able to touch and feel the product to check his work. Whereas, the digitizer does work in the virtual world with software and a DST file, PNG file, or other different files. The industry is running on mutual benefits and fulfilling the commitments. By now, I hope you all are much aware of digitized embroidery and how it works. Are you ready to get your own now? Keep these facts and information in mind and decide accordingly. At Cre8iveSkill, we have a team of embroidery digitizers who convert your artworks into digitized embroidery files and also provide customization services with an unbelievable turn around time of just 12 hours at amazingly low prices and best in business quality! 

A trustworthy embroidery digitizing and vector art conversion company providing world-class and highest quality results What are you waiting for? Get A Free Quote NOW! ADDRESS: Orange Tree Garments Cre8iveskill C-Wing, Ground Floor (W building) Mihan, Nagpur Maharashtra – 441108, India Email Id: info@cre8iveskill.com Phone No.:+91-9130010350, Whatsapp No.:+91-9130010350 Skype ID: Debashish.g1971  

Source: https://www.cre8iveskill.com/blog/embroidery-digitizing-everything-you-need-to-know